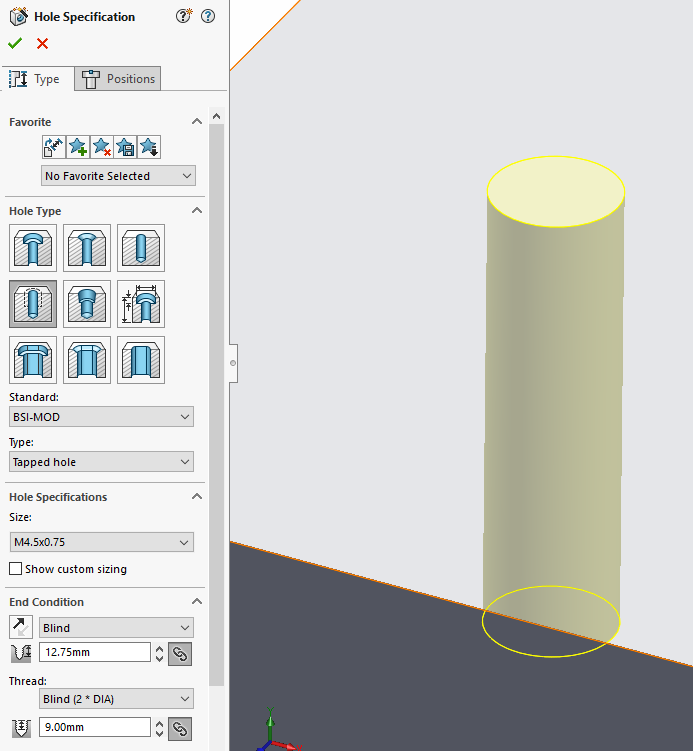
Hole Wizard is a great tool filled with cuts from a range of different standards. This blog will go through the process of how to customise the Hole Wizard library to include non-standard entries. Instead of altering the existing standards we will create a new custom standard based from one of the existing.
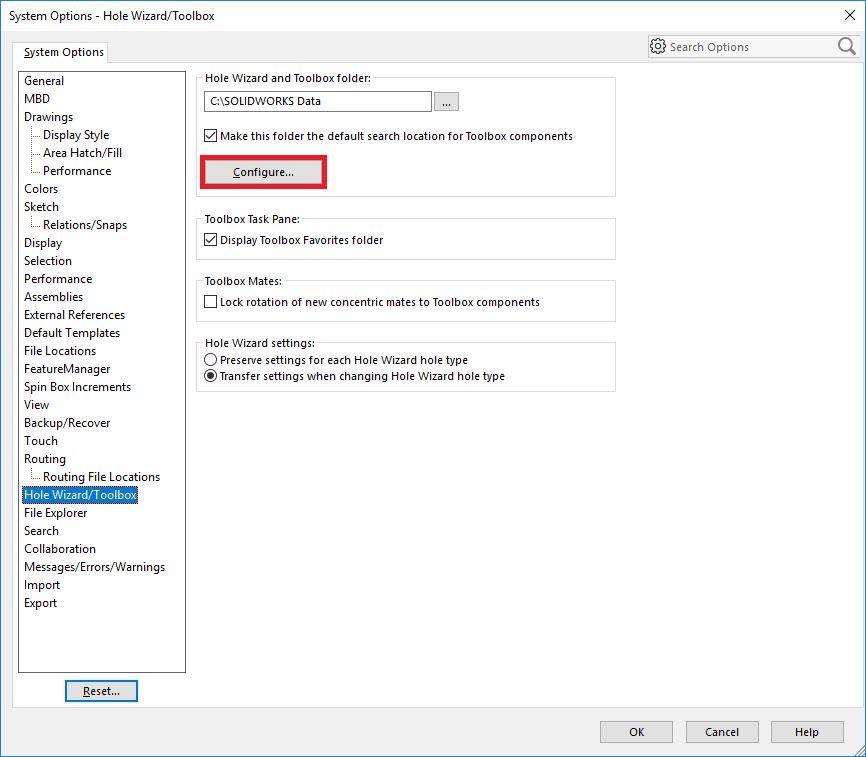
First from SOLIDWORKS go to Tools>Options>Hole Wizard/Toolbox and select Configure
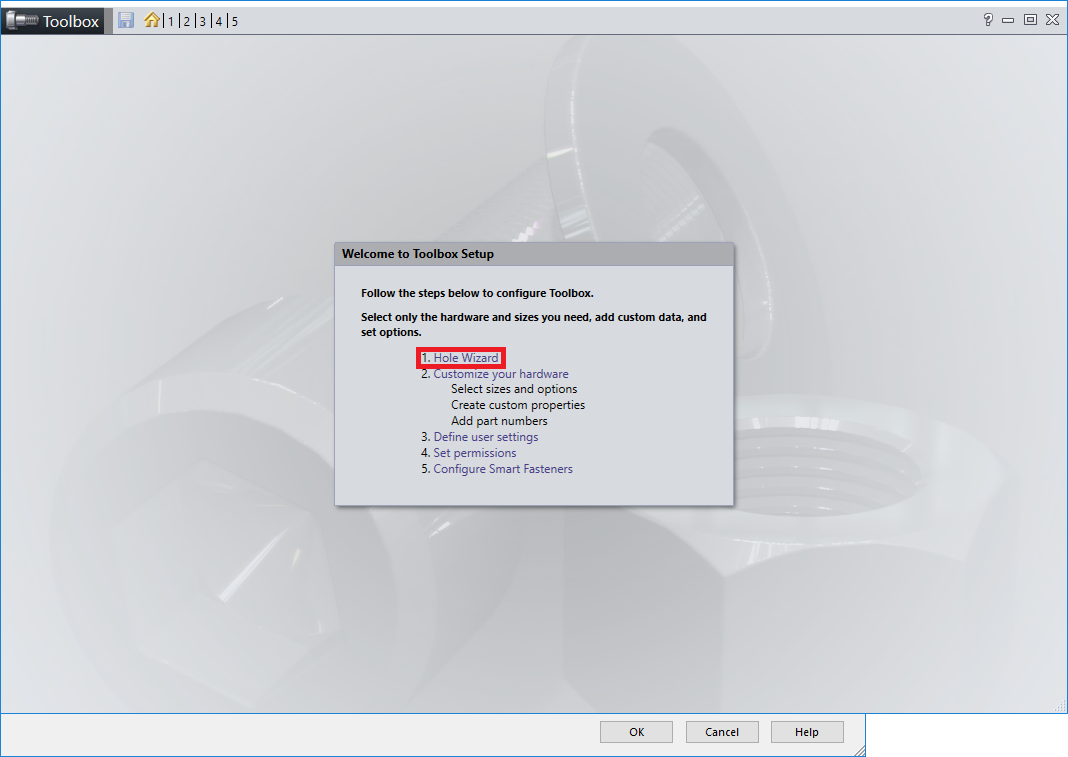
Select Hole Wizard.
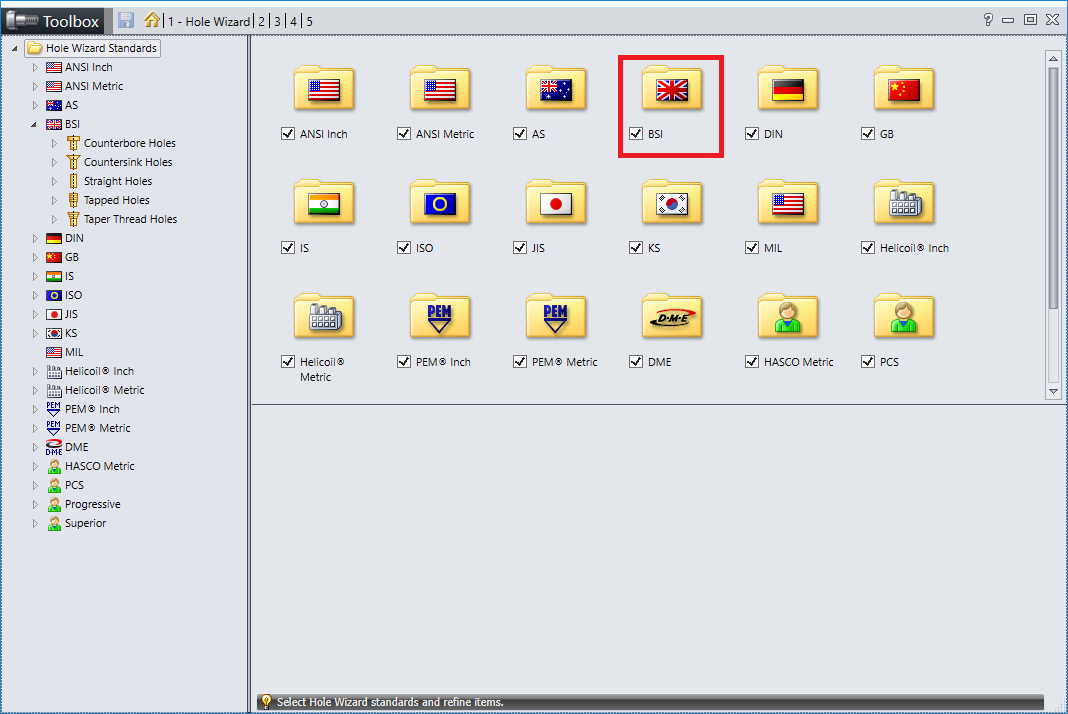
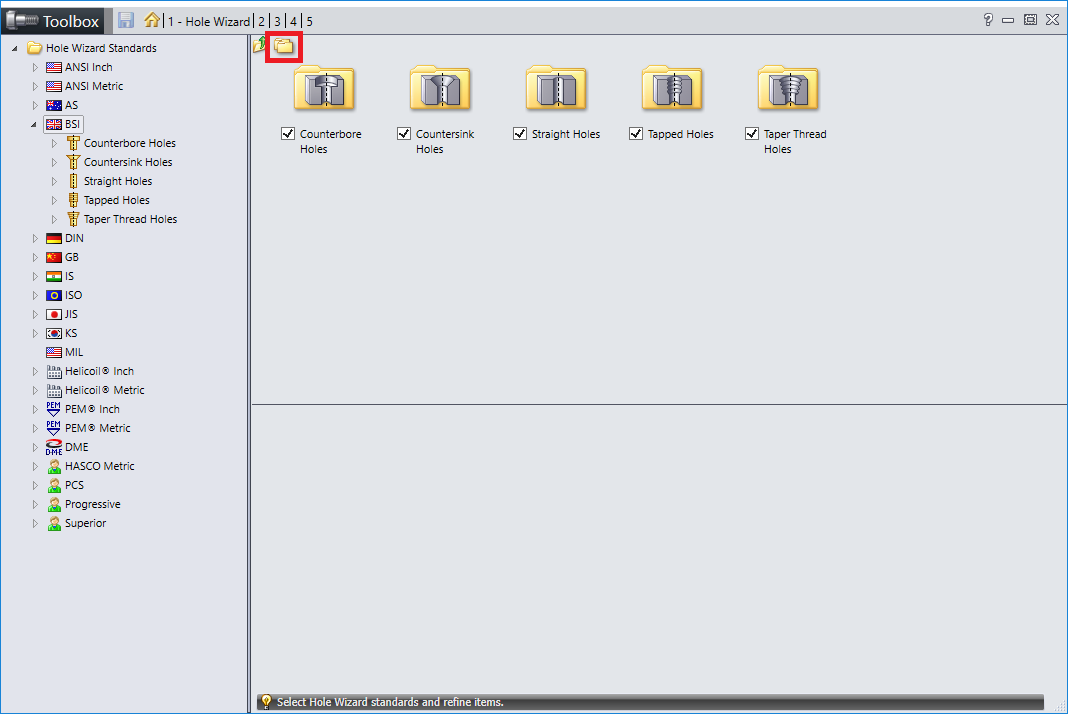
Select the standard which we are going to copy as our new modified standard, in this case I am using BSI.
Select Copy Standard in the top left and enter the new standard name, I will choose BSI-Mod but you can choose customer/supplier names which may have need of different standards.
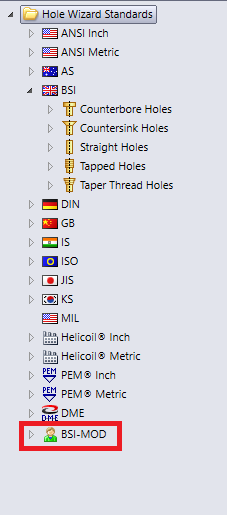
This will then appear in the bottom of the Hole Wizard Standard tree.
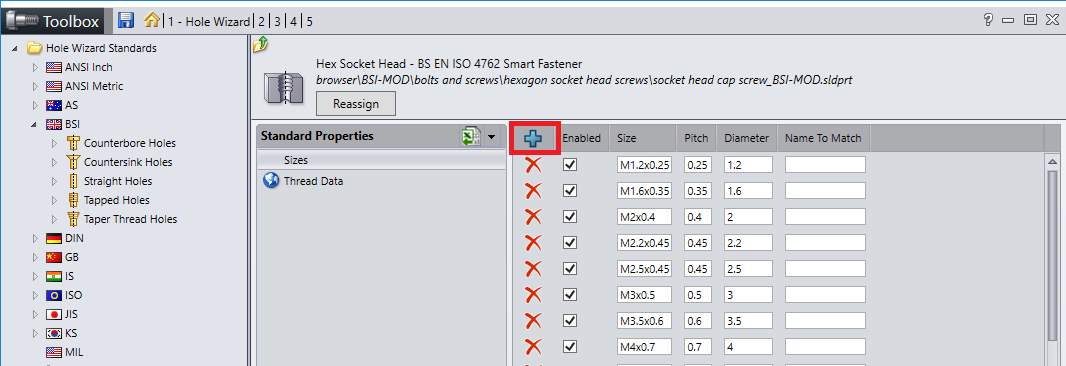
With a new standard in place we can open and navigate to the hole type we want to add to.
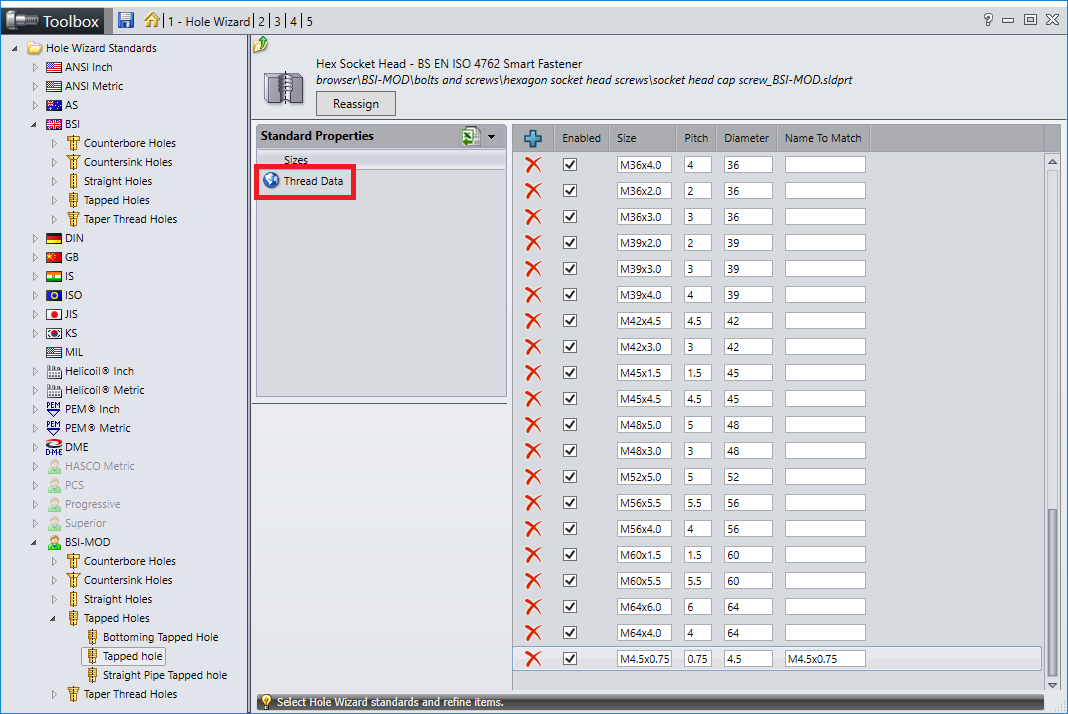
I have navigated to BSI-MOD>Tapped Holes>Tapped Hole then select the blue cross to add a new line.
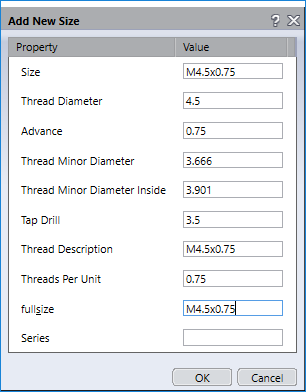
Add the new size information, we are adding an M4.5×075 tapped hole.
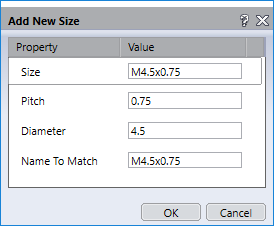
This will add the new size to the bottom of the list.

Next we add the thread information for the new size by clicking Thread data and the Blue Cross.
Save changes and exit the wizard.
![]()
Hole wizard now includes the new standard and size.
