

Mate Controller is a tool within SOLIDWORKS that lets users manipulate some mates within an assembly. These can be used to show a sequence of movements. Positions can be saved to form steps without the need for configurations.
These saved positions can then be saved as animations. Animations can be saved out of Mate Controller directly as .avi file. But can also be used in conjunction with Motion Studies. The animation wizard can create more complex animations based on the defined positions.
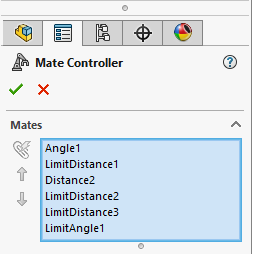
In SOLIDWORKS 2019, Mate controller supports angle, distance, limit angle, limit distance, path mate, slot and width mates. There need to be instances of these mates within an assembly to use Mate Controller.
- The first step is to mate the assembly up as required. Some of these mates must be those supported by mate controller – i.e. those you can amend the value of. For example, for one part a 0° angle mate has been used instead of a parallel mate. This allows for the control of the part’s orientation.
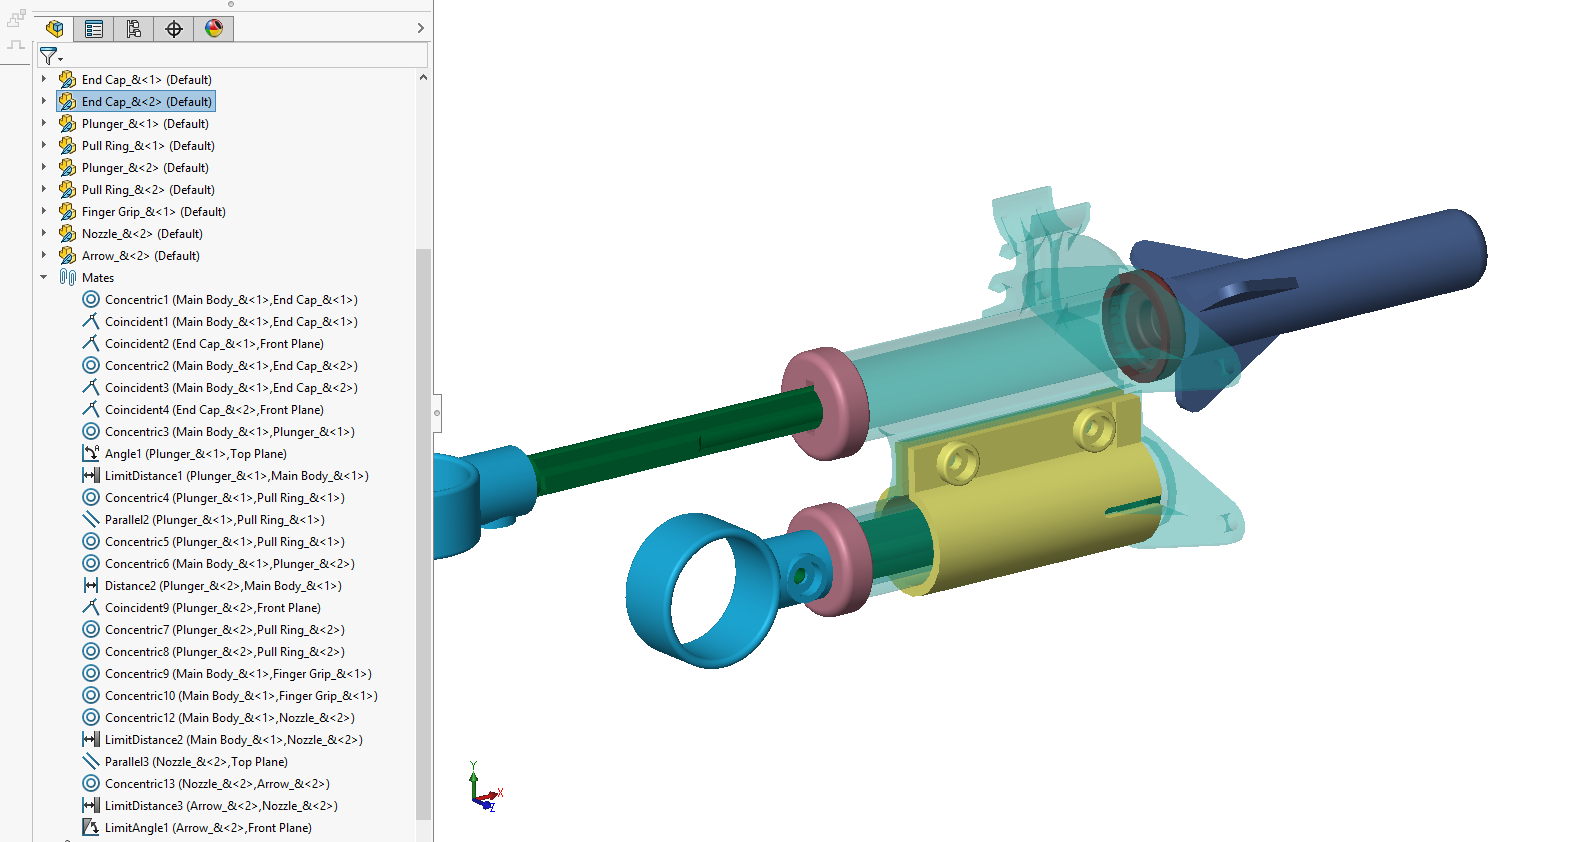
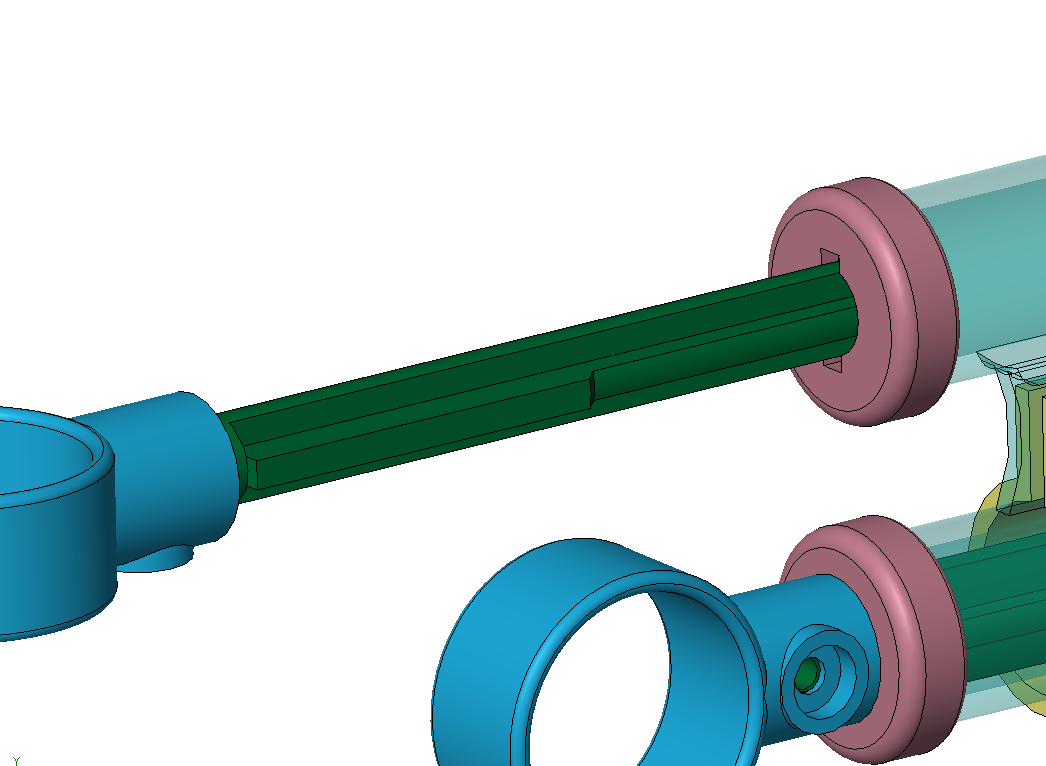
In this assembly, the green plunger being pushed down the barrel of the main body. Halfway down, there is a lock built in to the geometry. The plunger needs to be twisted so that the tabs are in the right position to move through the end cap. The movement on the plunger pushes the nozzle off the end. The foam arrow moves with it before detaching.
Some of the parts are not fully constrained.
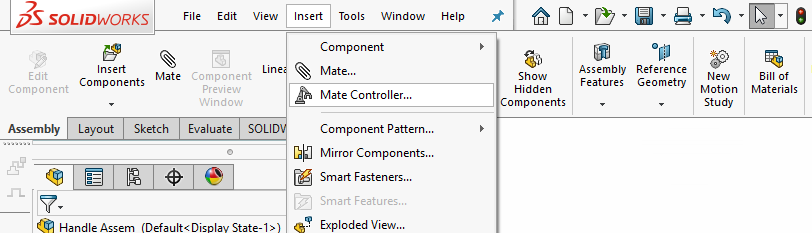
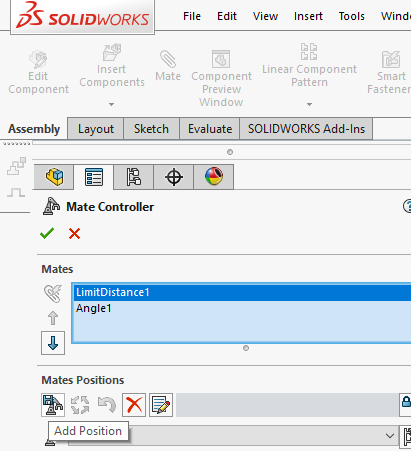
- Open Mate Controller. Insert > Mate controller. This will then bring the property manager up on the left-hand side.
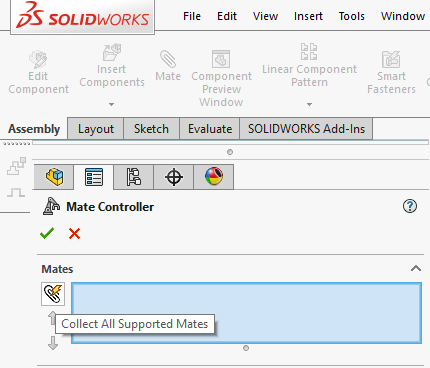
- For Mates in the Property Manager you can either populate this manually if there are more mates than required, or choose Collect all Supported Mates. This will add all mates eligible to be used in the Mate controller into the blue box.
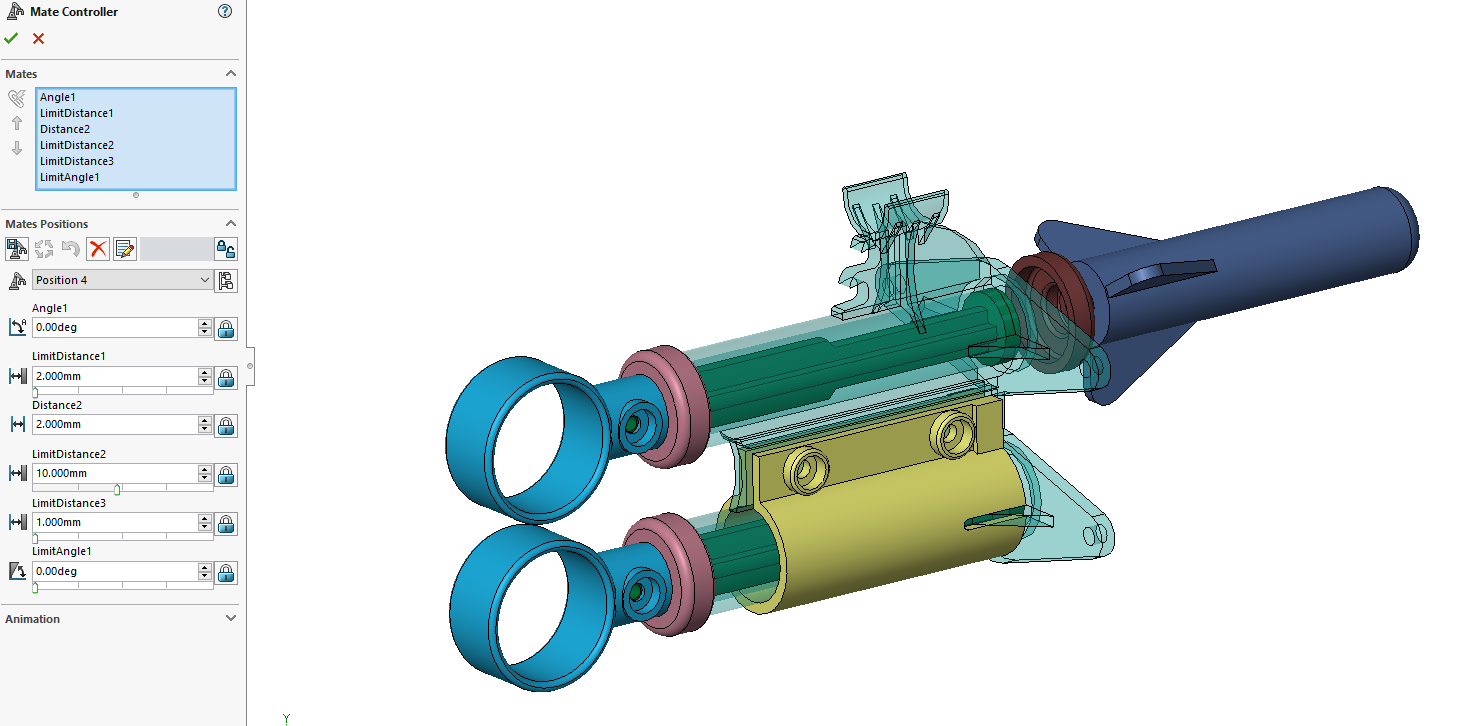
- Once all of the useable mates have been collected, the values at each position must be defined. By default, only Position 1 has been added.
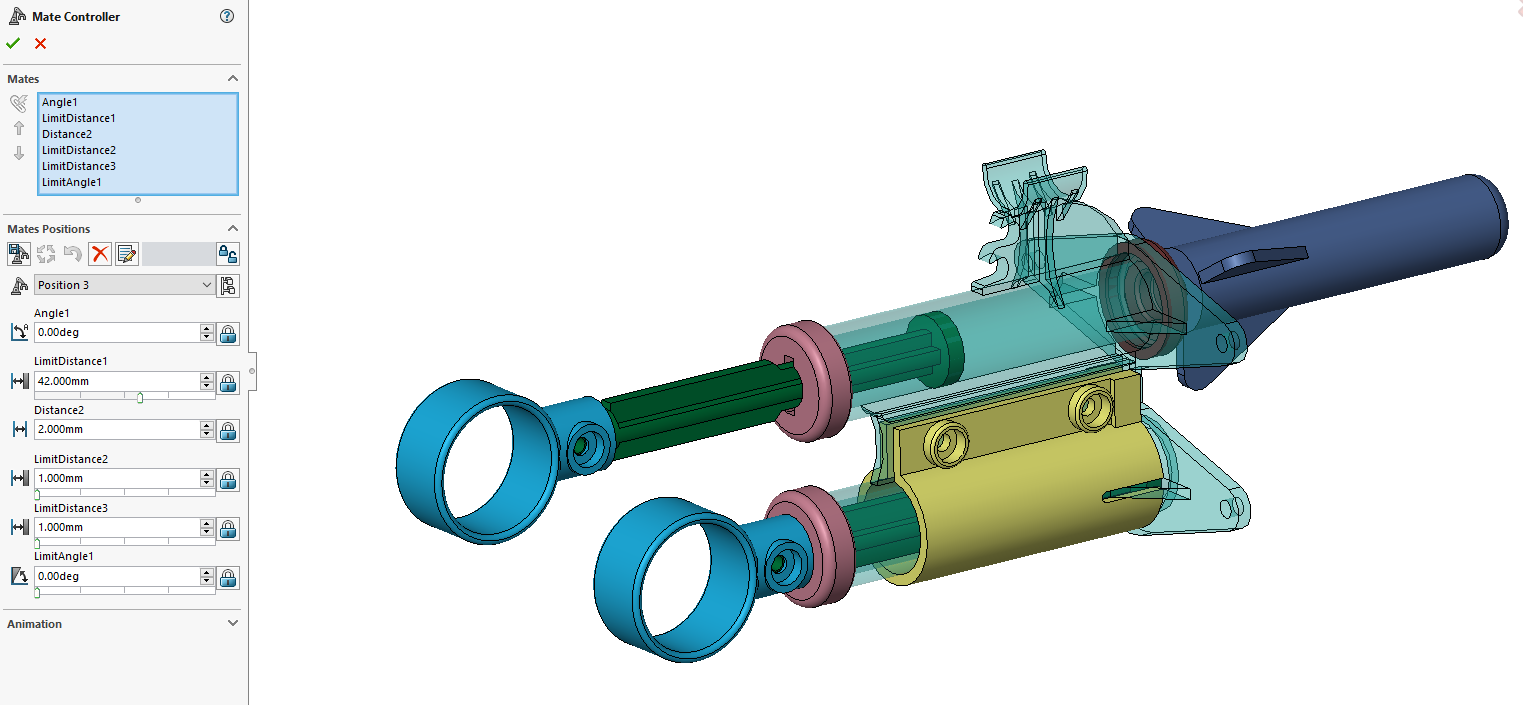
Within Position 1, values for each of the collected mates have been entered. As the values are adjusted, the position of the parts within the graphics area move to match. The first position should show the parts at the start of the sequence.
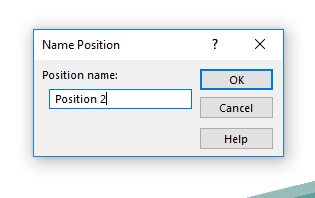
- Once defined, a second position can be added. Selecting Add Position adds Position 2 within the Mate Controller drop down. The values of Position 2 are now defined. The movements are created by amending the values of the mates to change the positions of the parts. The parts in the graphics area will illustrate their new positions.
Note: Each time a mate value has been adjusted, its position needs to be updated using Update Position. The change will then be applied and a new preview will show in the graphics window.
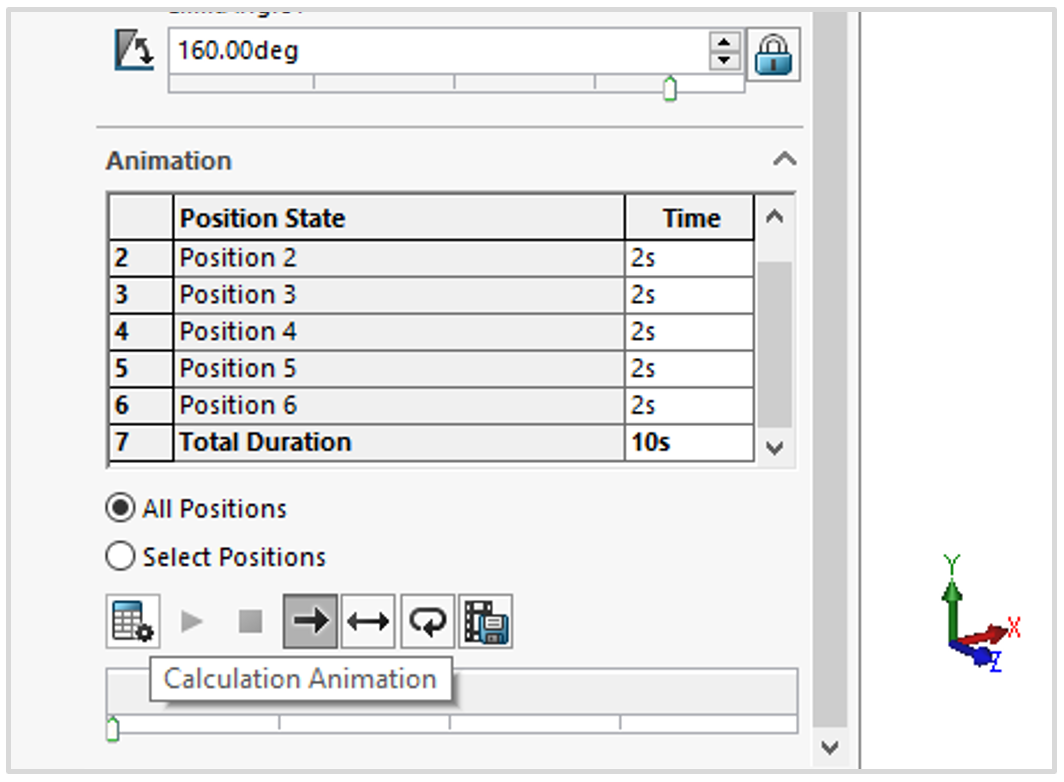
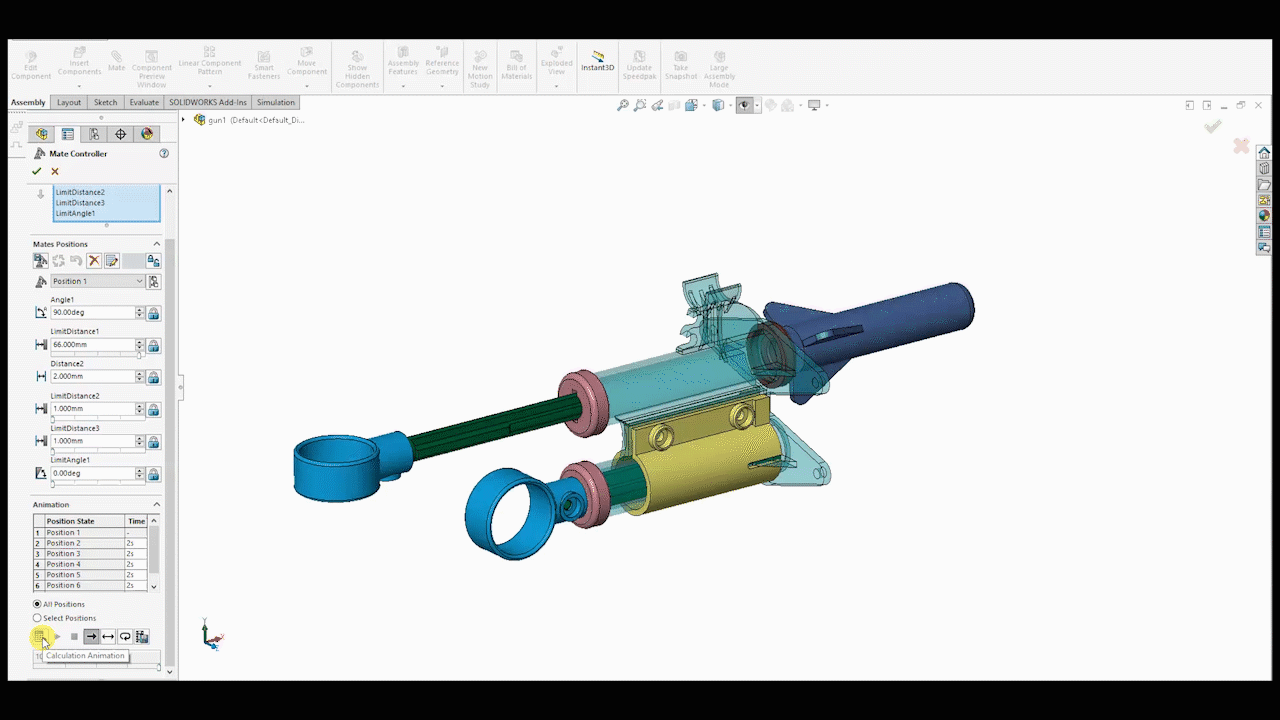
- Repeat these steps until all key positions are defined. The images below show the next key positions within the sequence. In this sequence, there are 7 positions in total.
To move from position to position within the Mate Controller PropertyManager, chose the positions from the drop down. This moves the parts within the graphics window to that position.
To move to these positions without the tool open, right-click on Mate Controller in the tree. This will bring up a drop-down list similar to that of configurations. Choose the position, accepting it with a green tick. In the graphics area, the parts move to position.
- Once the positions are defined, an animation can be viewed. Choose Calculate Animation. This will play an animation of the sequence in the graphics area. The selection of them all is defined by default. Alternatively, a selection of positions can be chosen. This can be saved if needed.
-
Additionally, these Mate Controller positions can be used to create animations within Motion Studies.
- At the bottom of the graphics area, choose a Motion Studies tab.
- Choose Animation as the type of study.
- Click Animation Wizard.
- Follow the dialog box through the steps. Select Mate Controller > Next > Key points (Import Type) > Next > Duration and Start Time (recommended to leave as defaults) > Finish.
- Click Calculate to view the animation.
Note: This Motion Studies animation can then be easily exported into Visualize.