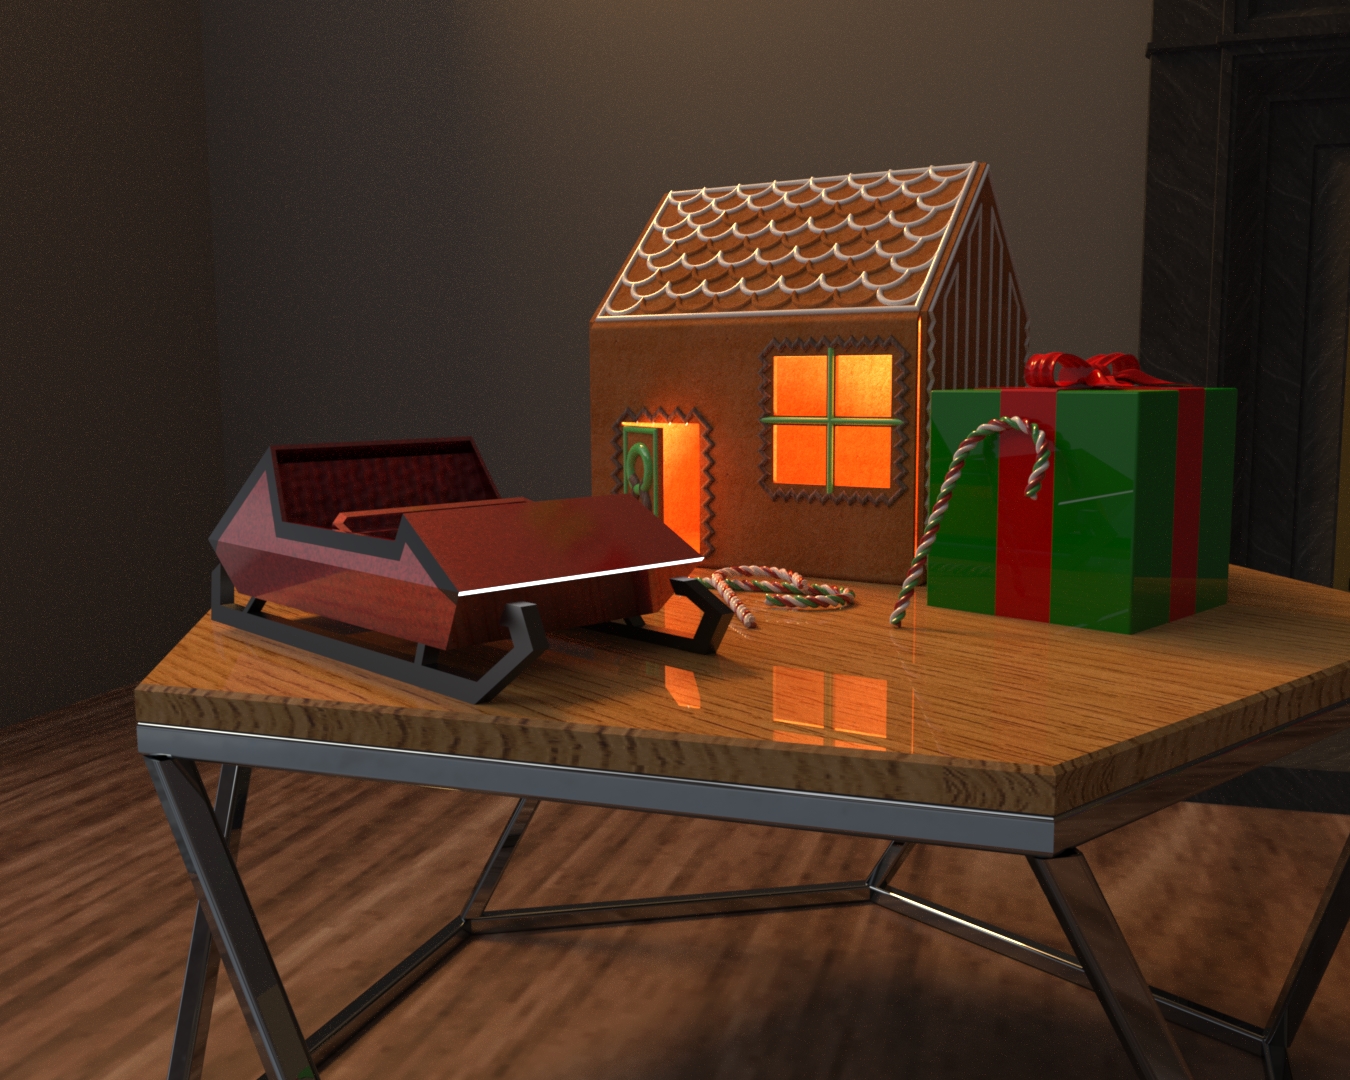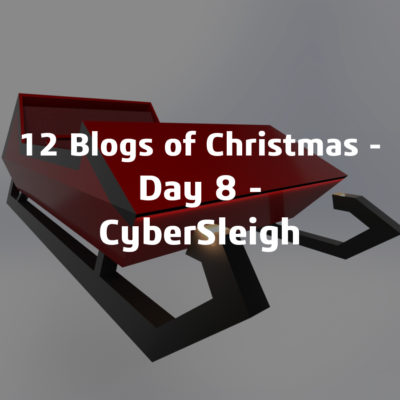

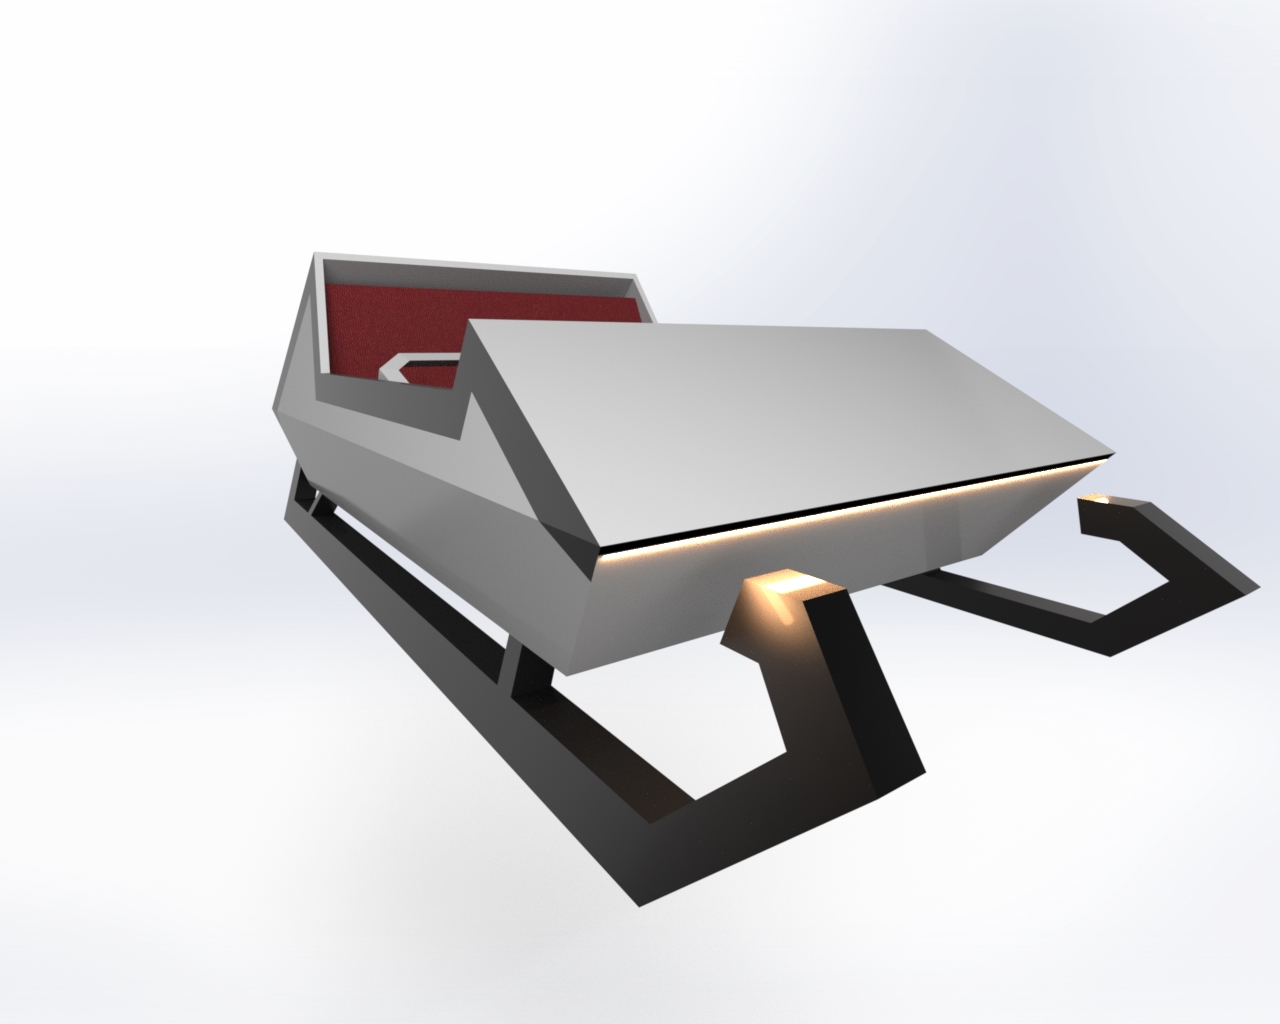
Designing a Cybersleigh
Today we will be designing Santa’s sleigh but with a futuristic twist, by creating a CyberSleigh where the looks are based off Tesla’s brand new CyberTruck. This sleigh features sharp angles in the design to help it cut through the air!
This blog will show you how to build up the sleigh from start to finish using multiple modelling techniques. This design contains very few difficult shapes so is a good model for beginners!
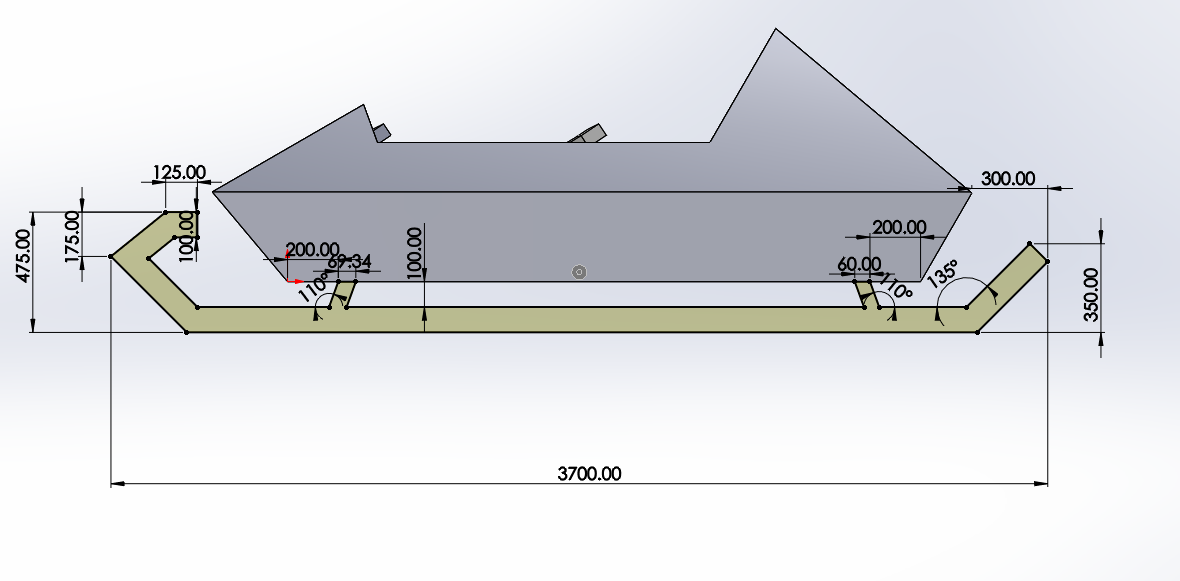
- The first step is to draw out the side profile of the sleigh. For this design, this shape is very simple. Be sure to full define the sketch.
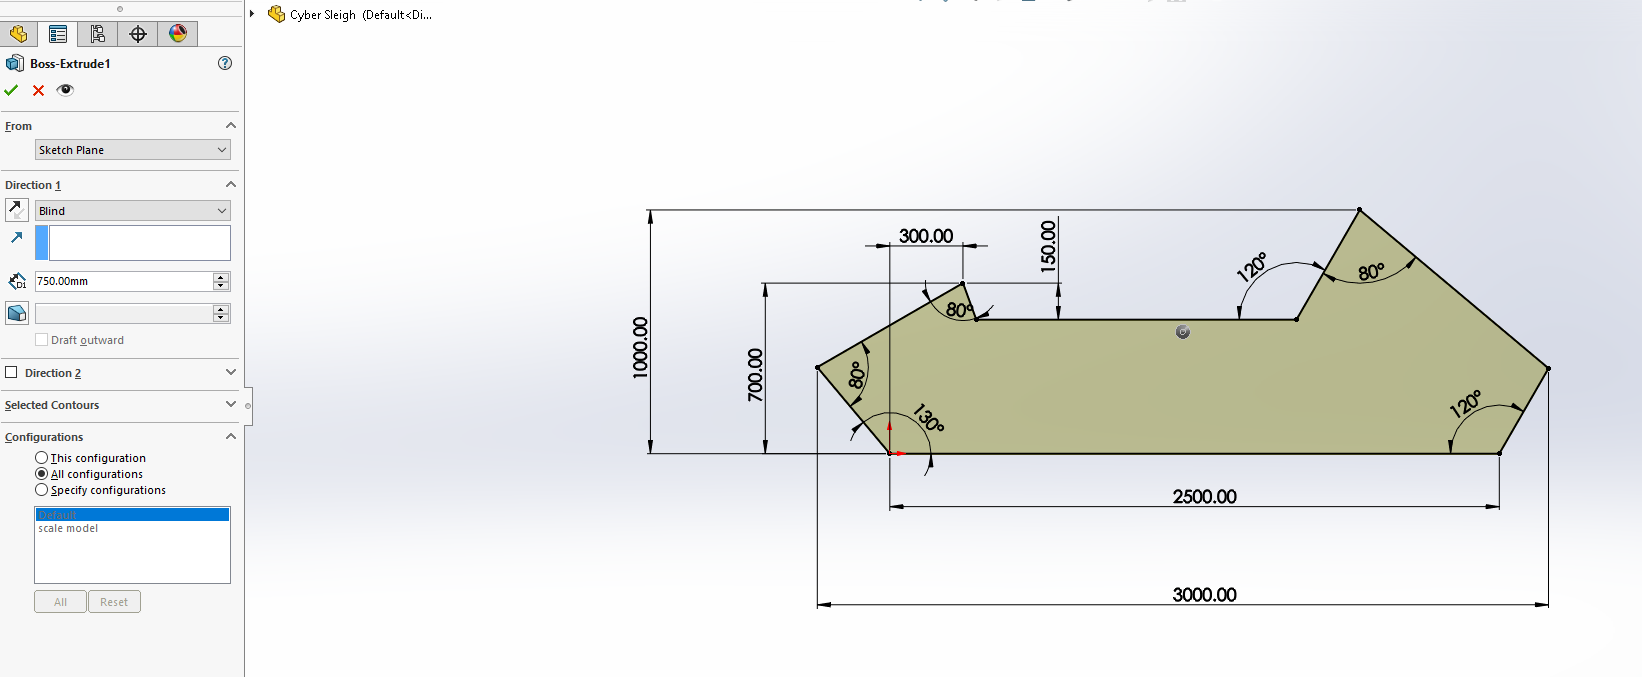
- Extrude this to half of the full width as we will be mirroring the body across later.
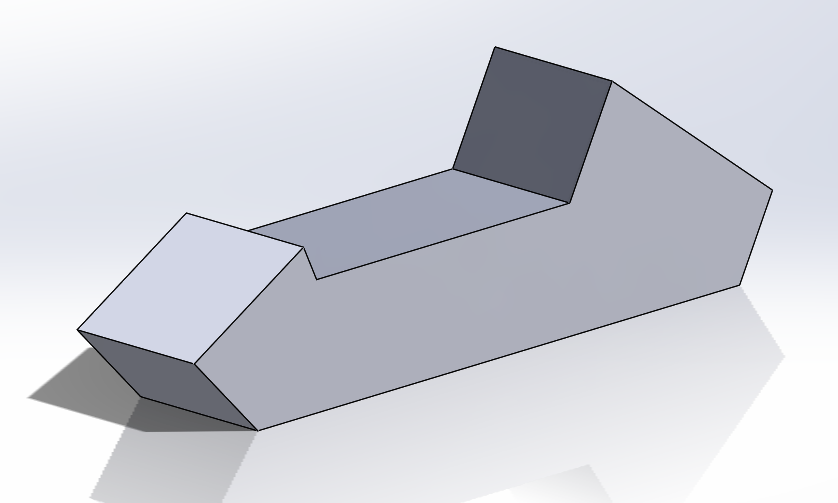
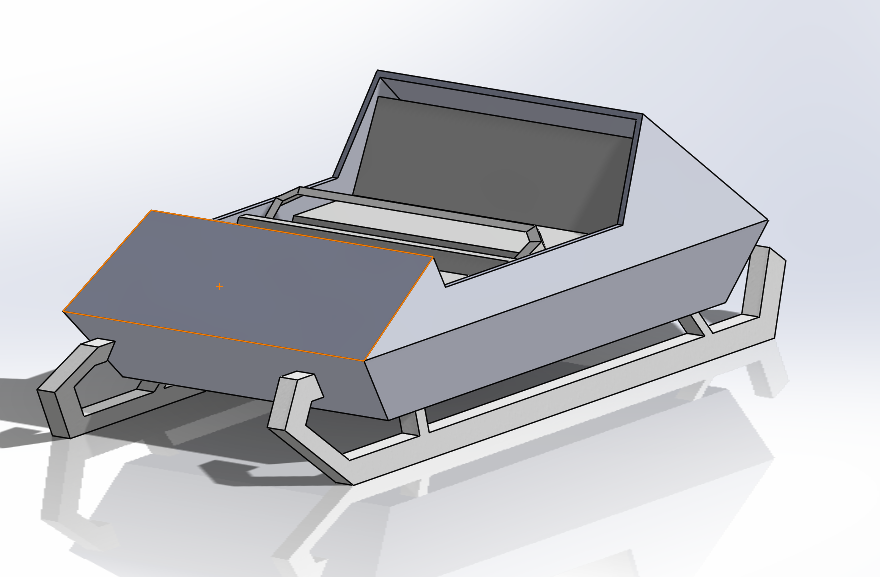
- Next, we need to add the angled side profiles to create more depth to the sleigh, this will also help fit in more presents! Sketch out a triangle as shown in the picture below. Relations have been added to the top and bottom of the sketch to fully define it.
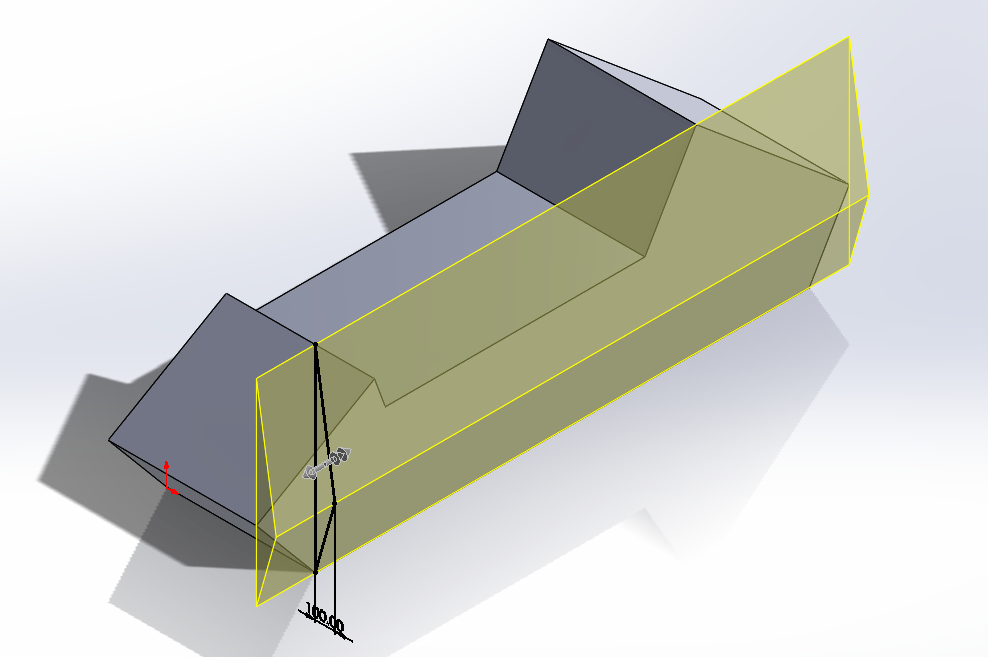
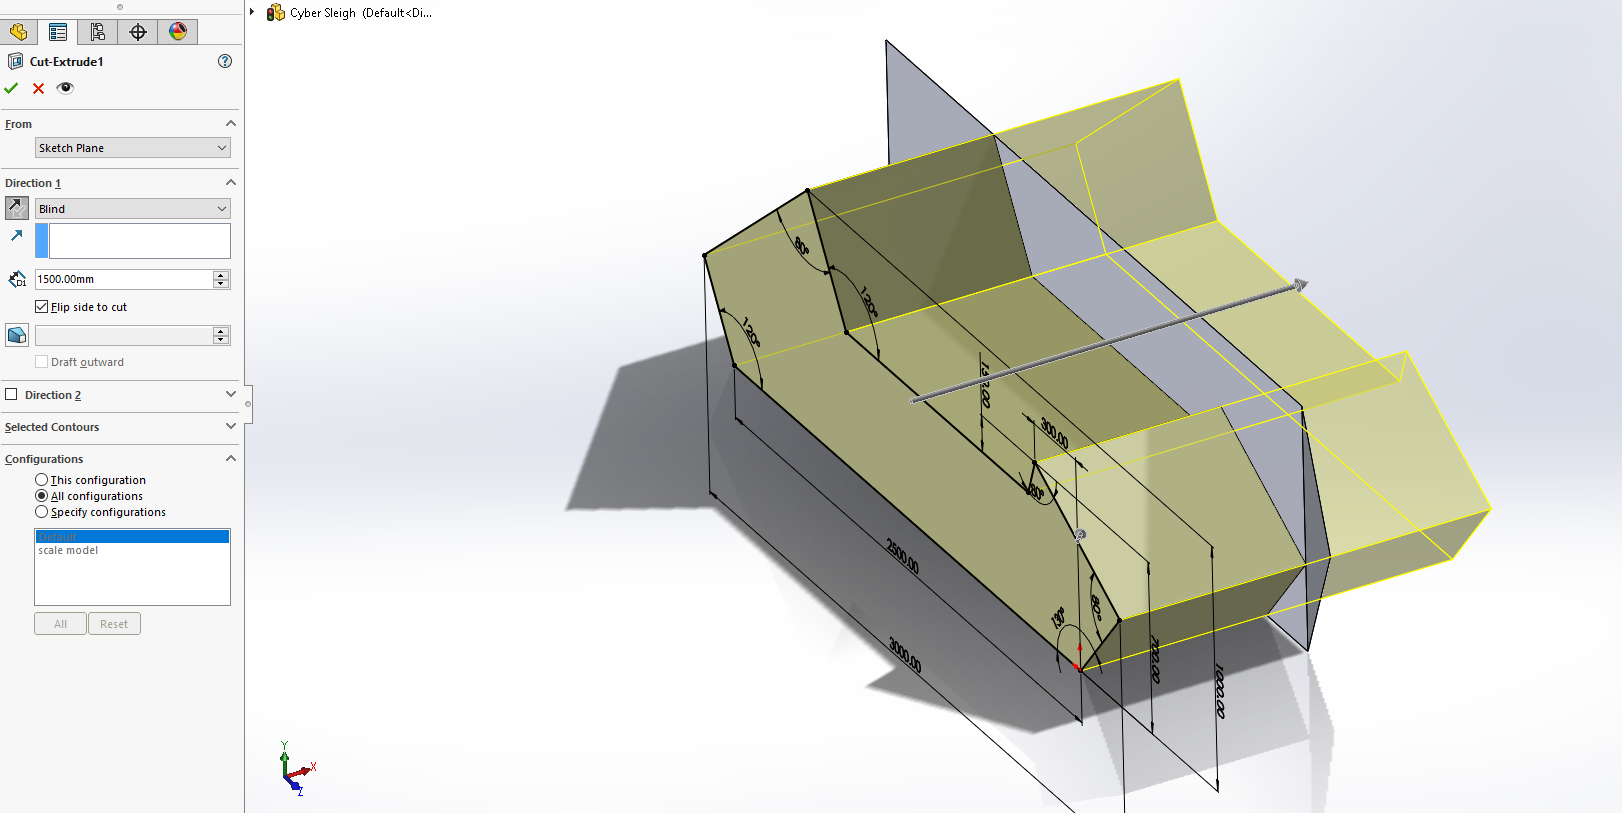
- Now trim back the extrude to match the shape of the main sleigh body. This can be done with the initial sketch we created in step 1. We can use this by selecting the sketch then clicking extrude cut. Make sure to fill the tick box to flip side to cut. Cut through all then shell the body selecting relevant faces.
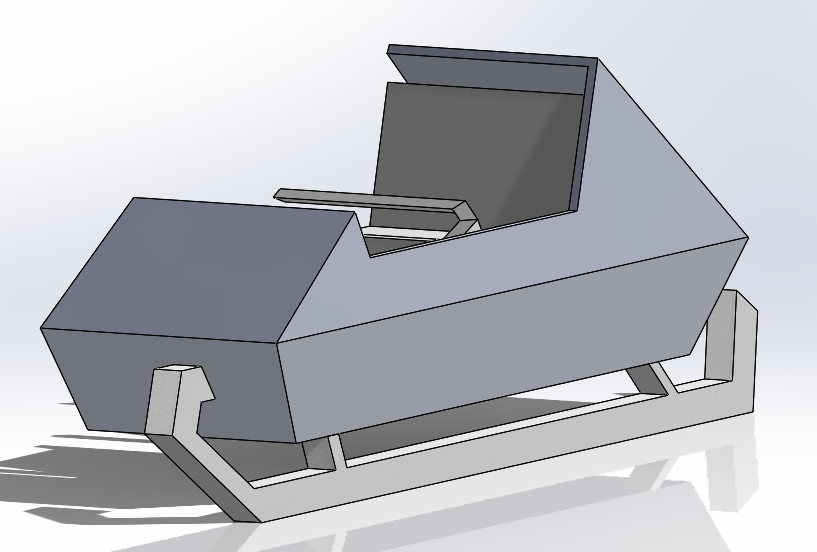
- Next, add in some seats. We have kept these very simple to keep in line with the design. It’s easiest to sketch these on the plane in the center of the sleigh and extrude them with the end constraint up to next.
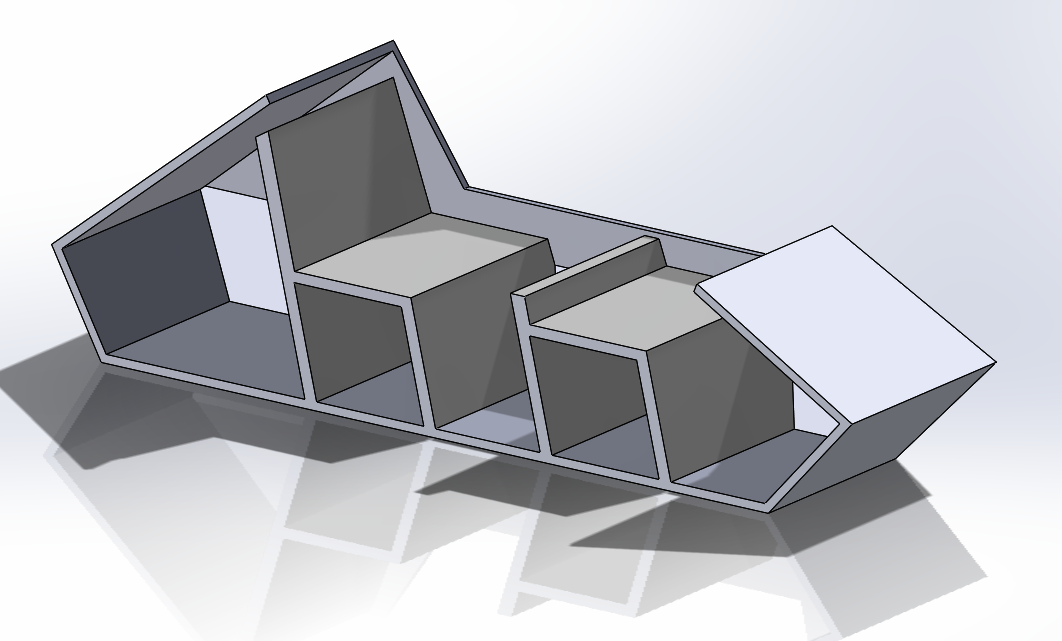
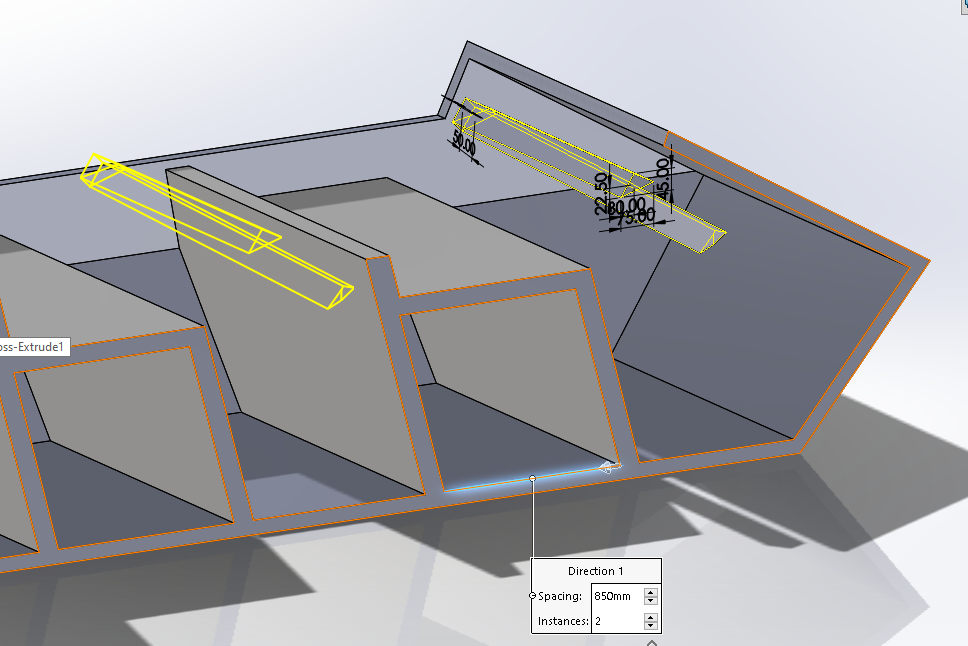
- Now we need to add in some safety features, a hand rail. The rail will help keep riders secure and help them duck in case of any rocks or other flying objects as this model has no windows! This was created with a 3-D sketch of the path which pierced the profile sketch. The profile sketch was drawn on the plane in the middle of the sleigh. A sweep was the used to create the rail with these two sketches.
- We also need a safety rail for the rear passengers. To save redrawing the two sketches needed for the sweep, we can use a linear pattern. We have spaced this out by 850mm and used an extrude cut to remove the excess material under the seat.
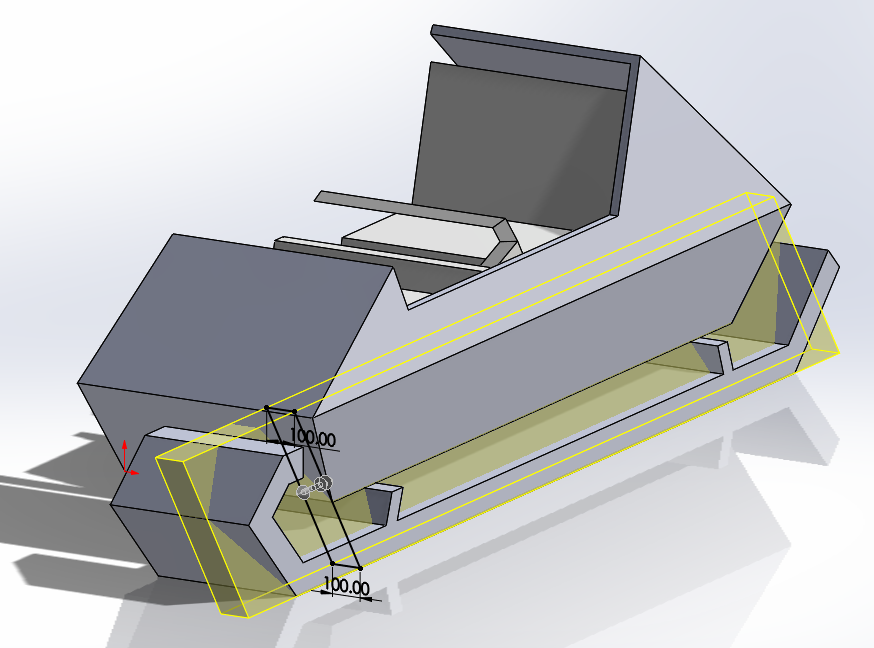
- Now that the modelling of the body is complete, we can begin with the landing skids. These are was gives the sleigh its immense pulling power which it needs to carry all those presents!
This was done in 3 stages.
- First, we created the side profile sketch and extruded this out. Untick merge result.
- Second, we sketched and extruded the front profile of the skids. Untick Merge result.
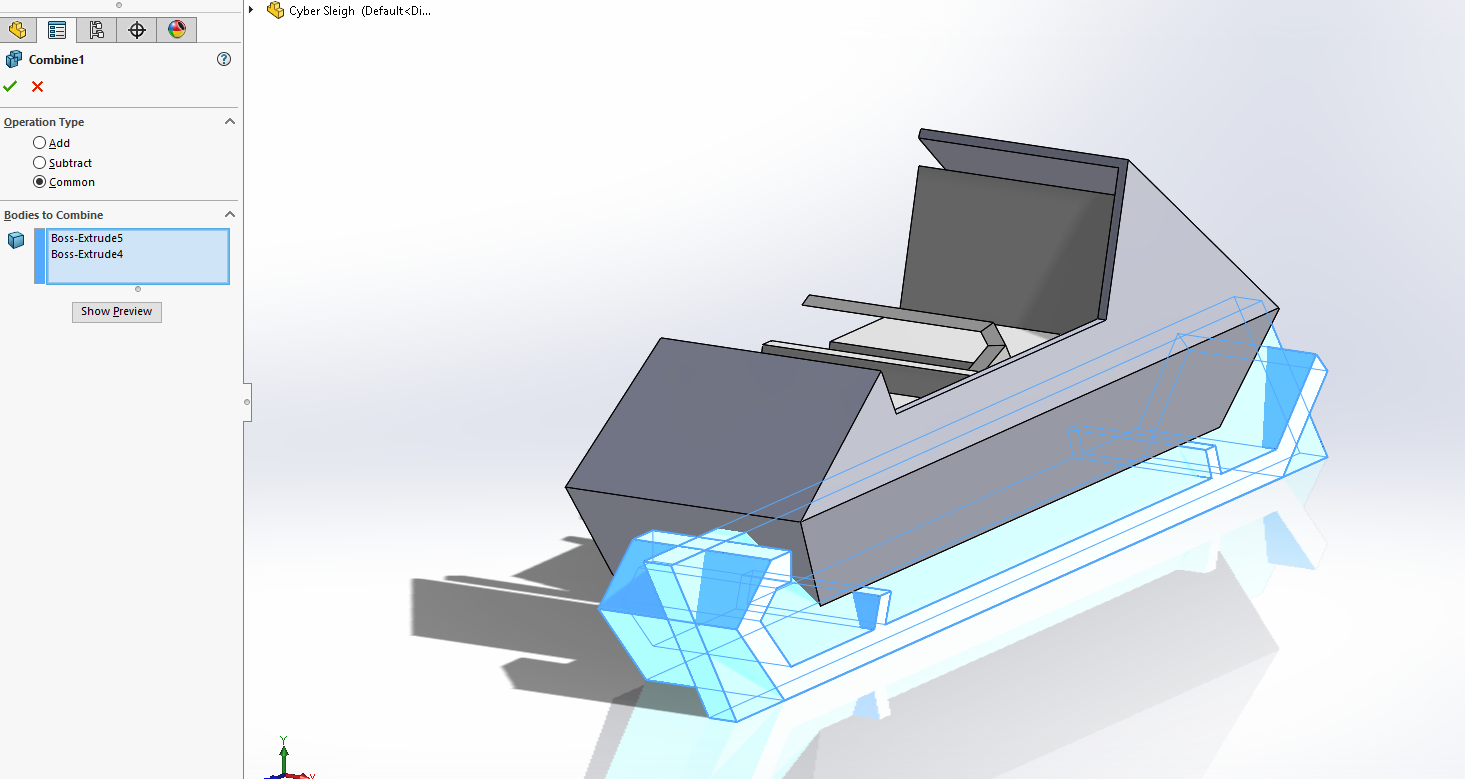
- And third, we used the combine command and selected common to create the shape created by the intersecting bodies.
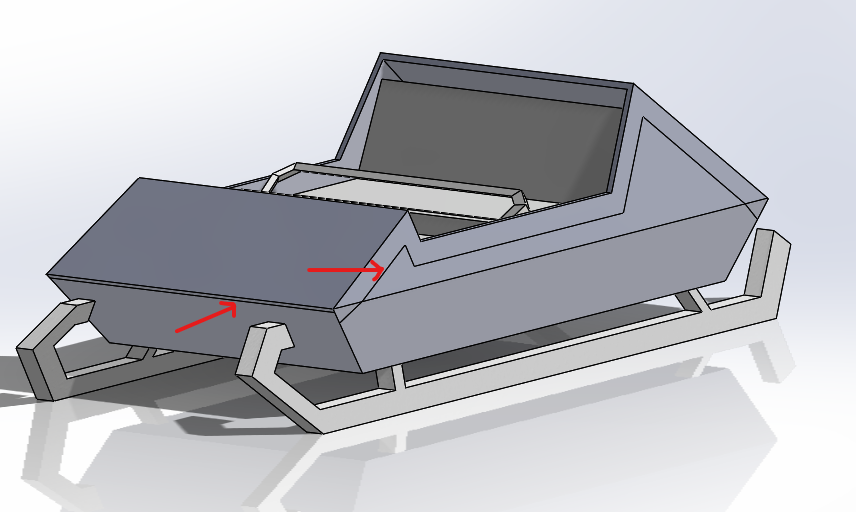
- Now that we have finished modelling half of the body, we can mirror it across. Firstly, combine all solid bodies and then mirror across. This saves us modelling the skids on both sides.
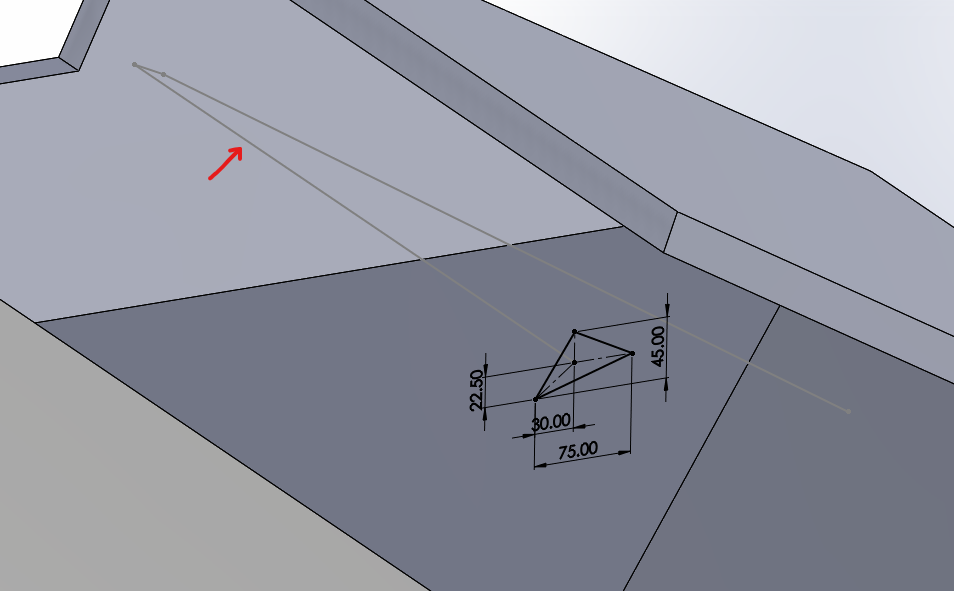
- Finally, we need to add in some lights and detailing. This has been achieved with splits lines to maintain the simple clean look throughout. Using offset entities, create the sketches and apply the split lines to the model, this will allow us to add multiple finishes to a single face.
Tip: If you are struggling to find the split line command or any other command, try searching for it in the search bar.
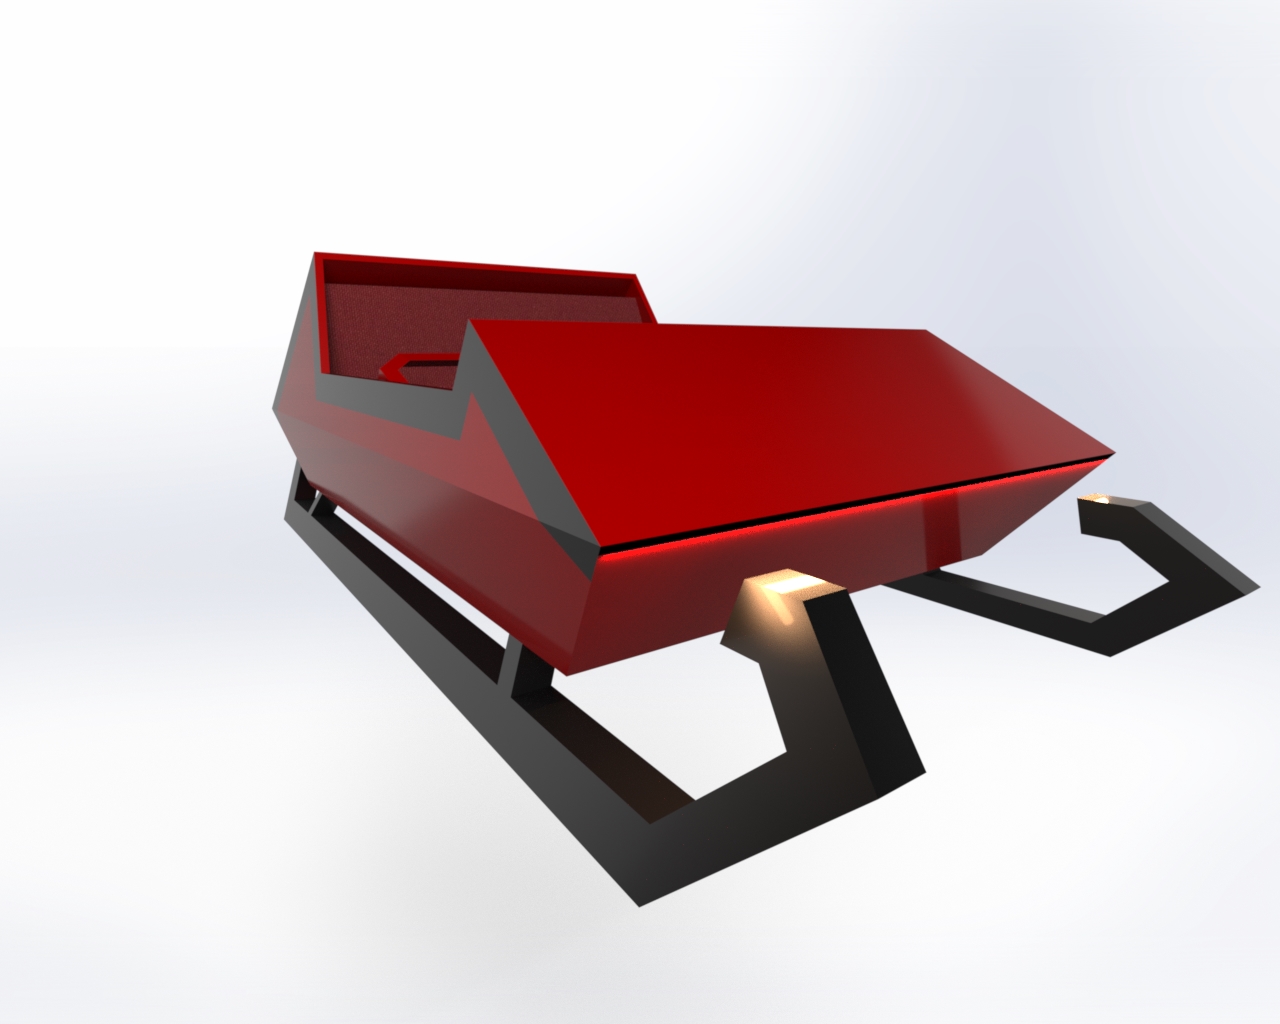
- We can now add some colour and do some rendering!
Bonus: You can use the scale command to reduce the size of the sleigh to create a nice desktop model.